
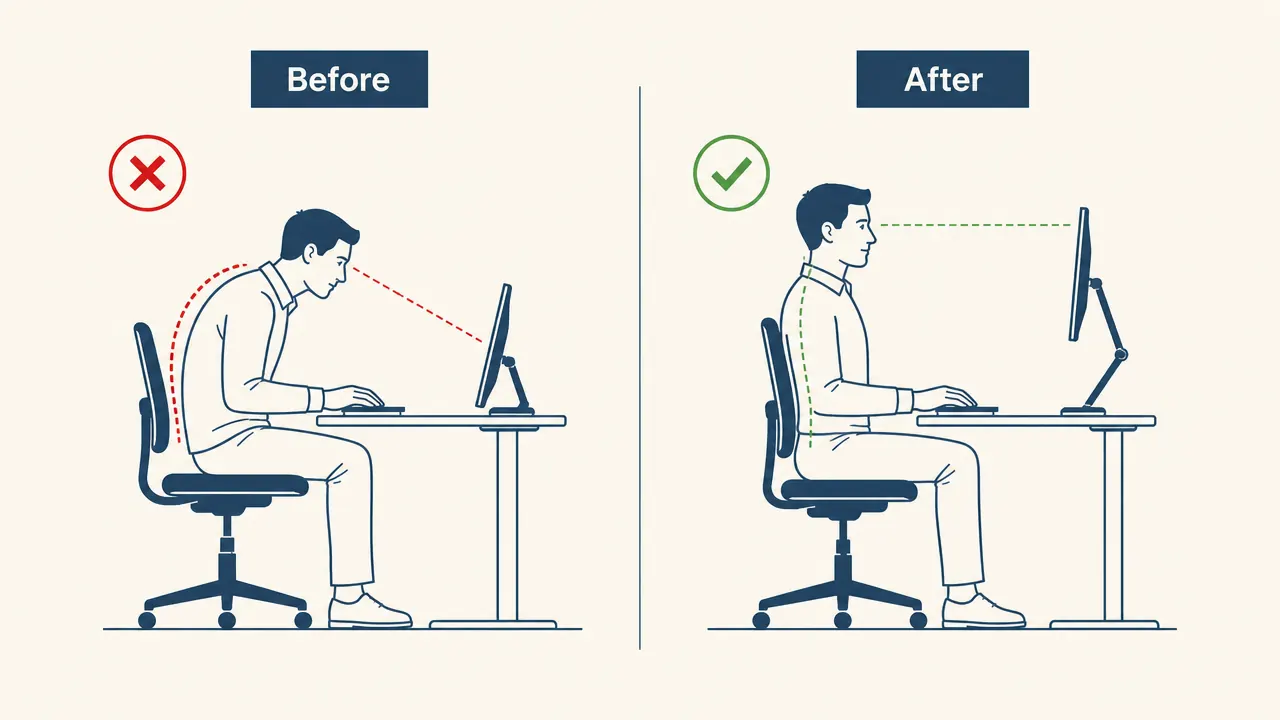
I ignored monitor height for two years. I told myself I was fine, that neck tension was just part of long screen days. Then I spent a week calibrating my setup properly and the afternoon stiffness that I had accepted as normal went away inside four days. The fix was not a massage or a stretching routine. It was moving my monitor up about four inches and locking it in place so it could not drift back down.
Monitor height is one of those adjustments that sounds simple but almost nobody gets right because most desks ship with a fixed monitor stand that puts your screen six to eight inches below where it belongs. This guide walks you through exactly how to measure the correct height, how to set it, and how to keep it there without fighting your setup every morning. The recommended tool for the locking-in step is the HUANUO FlowLift single monitor arm, which is what I use and what I have seen work on every desk setup I have helped friends and colleagues fix.
If your neck hurts by 2pm, your monitor is almost certainly too low.
The HUANUO monitor arm raises and locks your screen to the exact height your eyes need. 4.6 stars from over 16,000 buyers. Fits monitors 13 to 32 inches. Installs in under 20 minutes.
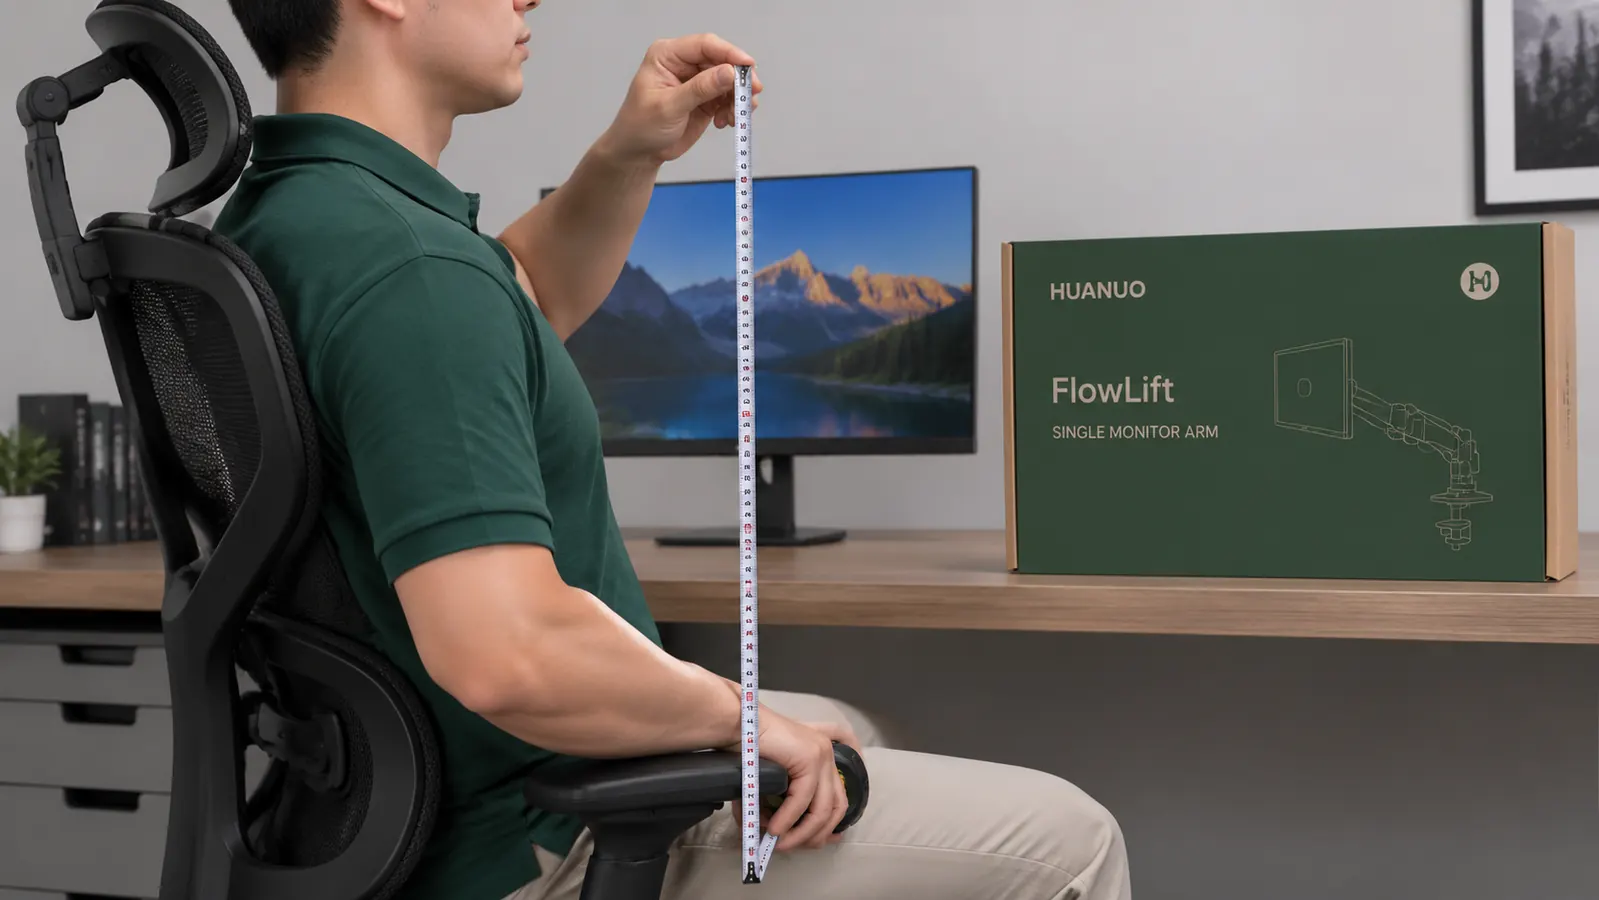
Amazon Check Today's Price on Amazon →Step 1: Measure Your Seated Eye Height Before You Touch Anything
Sit in your chair the way you actually sit during a workday, not the way you think you sit when someone is watching. Feet flat, back against the backrest, shoulders relaxed. Have someone mark the wall behind you at the exact height of your eyes, or use a tape measure to record the distance from the floor to your eye level. Write that number down. For most people it lands between 43 and 48 inches from the floor.
This measurement is your target. The top edge of your monitor should align with this number, not the center, not the bottom, the top edge. Your eyes naturally rest slightly downward when relaxed, so a monitor whose top edge is at eye level puts the bulk of your viewing area in the comfortable downward zone without forcing your neck to crane forward or drop toward your chest.
A lot of ergonomics guides tell you to set the monitor so the top third of the screen is at eye level. That works for some people, but in practice, top edge equals eye level is easier to measure, easier to reproduce, and close enough to optimal for almost every normal screen size. If you wear bifocals or progressive lenses, aim slightly lower so you can read through the bottom portion of the lens without tipping your head back.
Step 2: Measure Your Current Monitor Height and Find the Gap
With your seated eye height noted, measure how high your monitor currently sits. Put the tape at the desk surface and measure to the top edge of the monitor. Add your desk height (typically 28 to 30 inches from the floor) to get the floor-to-top-of-screen measurement. Compare that number to your seated eye height. Most people discover a gap of four to eight inches, meaning their monitor is sitting that far below where it needs to be.
If the gap is two inches or less, a monitor riser or a sturdy book stack can close it without additional hardware. Anything larger than that and you are fighting physics with a hack. A two-inch riser plus the height of your existing stand may tip the monitor or leave it unstable, and it will not give you the tilt and depth adjustments you also need. That is where a proper monitor arm earns its place on the desk.
Step 3: Set the Viewing Angle and Distance
Height alone is not the whole equation. Once you know the vertical target, you also need to set the tilt and the distance. The monitor face should tilt back between 10 and 20 degrees from vertical. That angle follows the natural forward tilt of your eyes when you look straight ahead, which means you read the full screen without flexing your neck. If your monitor face is perfectly vertical or angled toward you, the top of the screen will read at a different focal distance than the bottom, and your eyes will work harder to compensate.
Distance is the other variable people underestimate. The standard recommendation is arm length, which puts most monitors between 20 and 28 inches from your eyes. A good field test: sit naturally, extend your arm straight toward the screen. Your fingers should graze the panel or come close. If you are touching it with your elbow bent, the screen is too close. If your arm is fully extended and your fingertips fall short, it is too far. Adjust depth before you lock anything down.

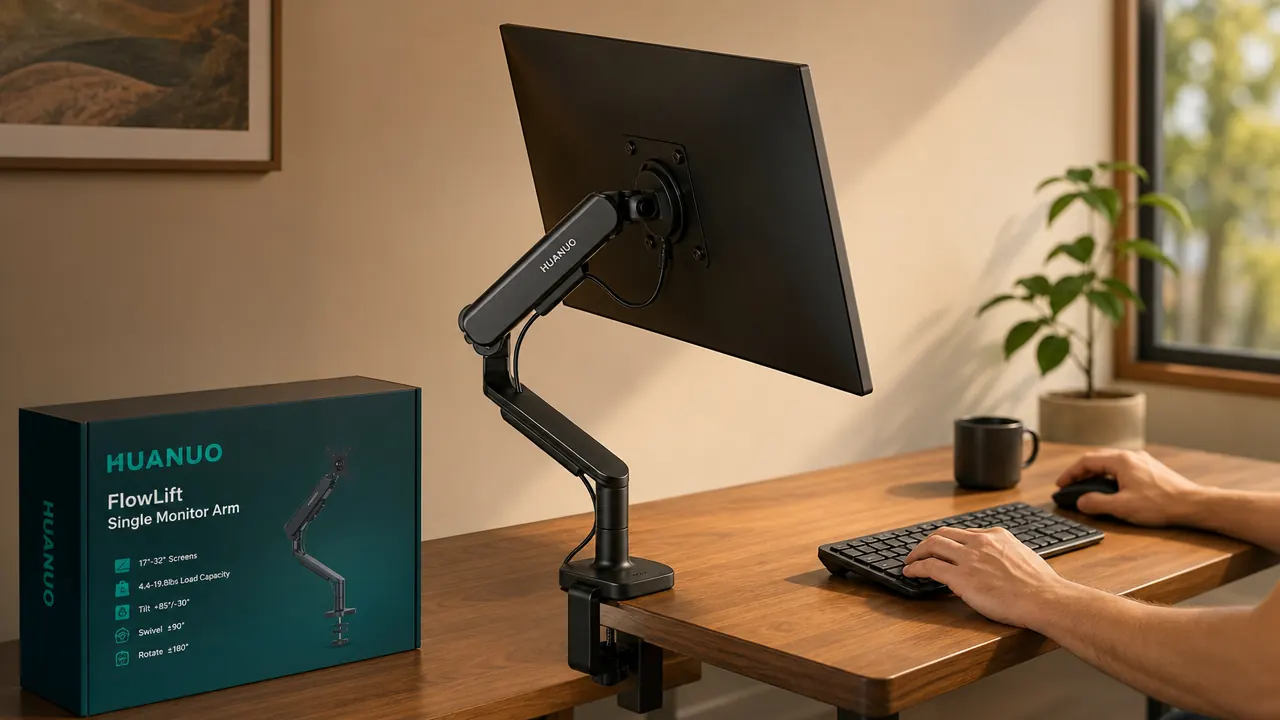
Step 4: Install the HUANUO Monitor Arm and Set Your Target Height
The HUANUO FlowLift arm is my go-to recommendation for this step because it covers the full adjustment range without the price premium of the premium arms. It handles monitors from 13 to 32 inches and supports up to 19.8 pounds, which covers nearly every consumer monitor including most 27-inch and 32-inch panels. The arm ships with both a C-clamp for desk edge mounting and a grommet base for desks with a pre-drilled hole, so it fits most setups out of the box.
Installation takes under 20 minutes. Attach the base to your desk using the C-clamp, tightening the clamp bolt until the base does not shift when you apply pressure from the side. Thread the VESA plate onto your monitor using the four screws included with the arm (or your own if your monitor VESA holes use a different thread size). Hook the monitor onto the arm joint and tighten the tension screw on the back of the arm until the monitor holds position when you let go. Set the height using your measurement from Step 1, set the tilt to roughly 15 degrees back, and route your cables through the cable management channel on the arm.
The one adjustment worth spending extra time on is the gas spring tension. The arm has a hex bolt on the rear of the main joint that controls how much resistance the spring provides. Tighten it until the monitor stays exactly where you place it with zero drift. Loose tension means the arm slowly sags over weeks, which is how people end up right back where they started. Two minutes with a hex key here saves a recurring problem.
Step 5: Verify and Fine-Tune After One Full Workday
Do not judge the setup in the first hour. Sit through a normal workday and pay attention to where your eyes are landing on the screen. If you catch yourself tilting your chin up to read the top of the screen, the monitor is still a touch too high. If you are tilting forward and down to read the bottom, it is a touch too low. The target sensation is neutral: you can see the entire screen without moving your head, just your eyes.
Also check your shoulder position at the end of the day. If your right shoulder (or left, depending on your mouse hand) is higher than the other, that usually means your monitor is shifted off-center relative to your natural sightline, or your keyboard and mouse position is pulling your arm into a compensating posture. The monitor arm lets you swivel the screen left or right without moving the base, so use that to center the display exactly in front of your primary work position, not in front of the middle of your desk if those two spots are not the same thing.
The monitor height that feels right in the first five minutes is not always the one that feels right at the end of a full day. Set it, sit through it, then make the small tweak.
What Else Helps Once the Height Is Right
Monitor height is the biggest lever, but it is not the only one. Once the screen is in position, your chair height and lumbar support become the next variables. If your chair puts your hips too low, your seated eye height drops and the monitor calibration you just did stops matching. Set the chair so your thighs are roughly parallel to the floor, your feet are flat, and your lumbar curve is supported. The monitor height and the chair height are linked, so if you adjust one significantly, re-check the other.
Lighting is the other underrated factor. A monitor at the correct height in a room with a bright light source directly behind it still causes eye fatigue because of glare and contrast mismatch. Position the screen so windows are to the side rather than behind or in front of it. Use a desk lamp positioned to the side of the monitor to provide ambient illumination without hitting the screen face directly. These two steps, combined with the height correction, are what actually make a full eight-hour workday feel different from what you have been tolerating.
For deeper reading on how the HUANUO arm performs over time, including long-term gas spring behavior and cable management details, see the full long-term review. If you are deciding between the HUANUO and the VIVO single arm, the side-by-side comparison covers the build quality and adjustability differences that matter most for home office use.
Your neck should not be sore by lunchtime. The fix is a one-time 20-minute install.
The HUANUO monitor arm locks your screen at the exact height you measured in Step 1 and holds it there. No more drift, no more riser stacks. 4.6 stars, 16,094 ratings, fits 13-32 inch monitors, ships with both C-clamp and grommet base.
Amazon Check Today's Price on Amazon →